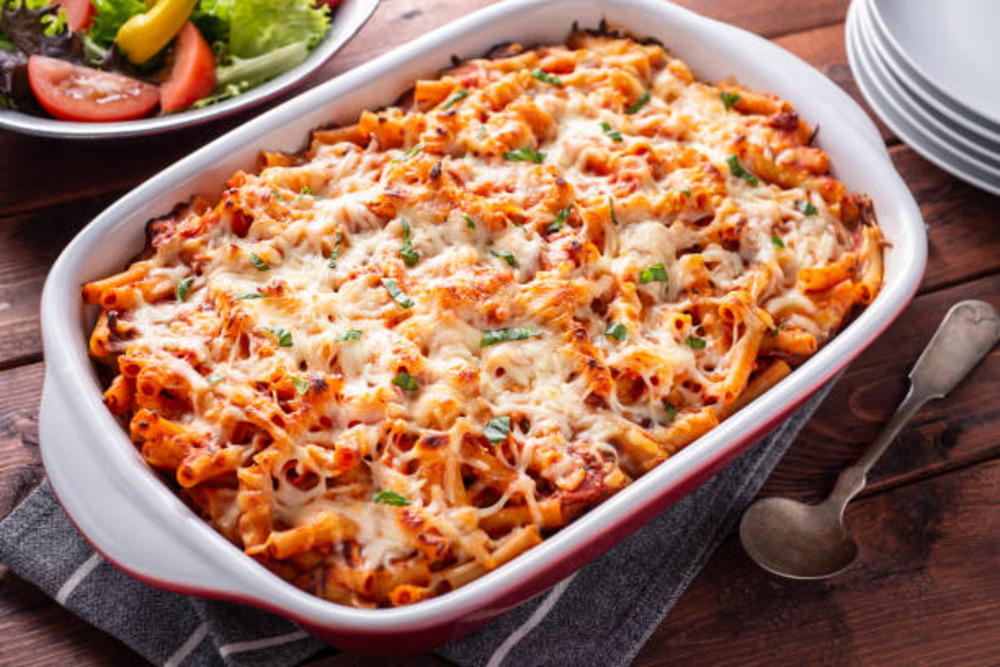
Baked Ziti with Ground Beef and Ricotta Recipe
Baked ziti with ricotta is a luxurious Italian delight featuring a rich, savory meat sauce, a creamy ricotta mixture, and tender ziti pasta. This classic comfort dish is sure to satisfy and impress with its harmonious blend of flavors and textures.
Print
Pin
Servings: 8 servings
Ingredients
Sauce:
- 2 pounds ground beef
- 2 tablespoons olive oil
- 1 cup chopped onion
- 1 tablespoon minced garlic
- 1 1/2 teaspoons salt
- 1 teaspoon black pepper
- 2 24-ounce jars spaghetti sauce
- 3 teaspoons Italian seasoning
Ricotta Filling:
- 24 ounces ricotta cheese
- 2 large eggs
- 1/4 teaspoon nutmeg
- 1 teaspoon Italian seasoning
- 1 cup shredded mozzarella cheese
- 1 cup grated Parmesan cheese
Pasta:
- 12 ounces uncooked ziti pasta
Topping:
- 2 cups shredded mozzarella cheese
Instructions
- Preheat your oven to 350°F (177ºC).
Make Sauce:
- In a large, high-sided skillet, heat 2 tablespoons of olive oil over medium-high heat. Sauté 1 cup of chopped onion until it turns translucent, which should take about 5-7 minutes, being careful not to let the onion brown. Reduce the heat to medium-low and add 1 tablespoon of minced garlic, cooking until it becomes fragrant, about 1-2 minutes. Increase the heat to medium, add 2 pounds of ground beef along with 1 1/2 teaspoons of salt and 1 teaspoon of black pepper, and cook until the beef is no longer pink, draining any excess fat as necessary. Stir in 2 jars of spaghetti sauce and 3 teaspoons of Italian seasoning.
Make Ricotta Filling:
- In a large mixing bowl, combine 24 ounces of ricotta cheese, 2 large eggs, 1/4 teaspoon of nutmeg, 1 teaspoon of Italian seasoning, 1 cup of shredded mozzarella cheese, and 1 cup of grated Parmesan cheese, mixing thoroughly.
Pasta:
- Cook 12 ounces of ziti pasta according to the package instructions. Drain the pasta well and set it aside.
Assembly:
- Spread 1/2 cup of the prepared meat sauce over the bottom of a 13x9-inch baking dish. Layer half of the cooked pasta over the sauce, followed by half of the meat sauce. Dollop half of the ricotta mixture over the meat sauce, spreading it into an even layer using an offset spatula. Repeat these layers, finishing with the remaining ricotta mixture. Place the baking dish on a rimmed cookie sheet to catch any potential spills.
- Cover the baking dish with foil and bake in the preheated oven for about 40 minutes, or until a thermometer inserted into the center reads 160°F. Remove the foil, sprinkle the top with the remaining 2 cups of shredded mozzarella cheese, and bake for an additional 10 minutes, or until the cheese has melted and become bubbly. Allow the baked ziti to stand for 15 minutes before serving to let it set properly.
Notes
Pasta Water: Salting the pasta water is crucial for enhancing the flavor of your dish. I recommend adding 1-2 tablespoons of salt to about 4 quarts of water. As the pasta cooks, it absorbs the water, so it's essential to ensure the water is well-seasoned. If you're unsure, perform a taste test by cooking a small amount of pasta both with and without salt.
Al Dente: Cook your ziti pasta to an al dente texture, meaning it should still be a bit firm in the center. While you can cook it to your preference, al dente pasta holds up better in the oven and maintains the desired texture in your baked ziti.
Layers: The arrangement of layers in your baked ziti with ricotta is important. Start with a layer of meat sauce at the bottom of the pan to prevent sticking, then add pasta, more meat sauce, and finish with the ricotta mixture. This layering ensures that every bite contains the perfect balance of ingredients.
Let It Rest: Allow your baked ziti to rest for 10-15 minutes before serving. This resting period helps the dish set, allowing the flavors to meld together and preventing a soupy consistency when served.
Pan Size: Our recipe is designed to fill a 9x13-inch Pyrex dish to its maximum capacity. We gently press down the top layer with the back of a large spatula. If you have a ceramic 9x13-inch dish with a slightly larger capacity, I recommend using that for a more comfortable fit.
Spillovers: Place the baking dish on a rimmed baking sheet before putting it in the oven. This will catch any potential spillovers (though I've never experienced any, even with a Pyrex dish) and makes it easier to move the baking dish in and out of the oven.