
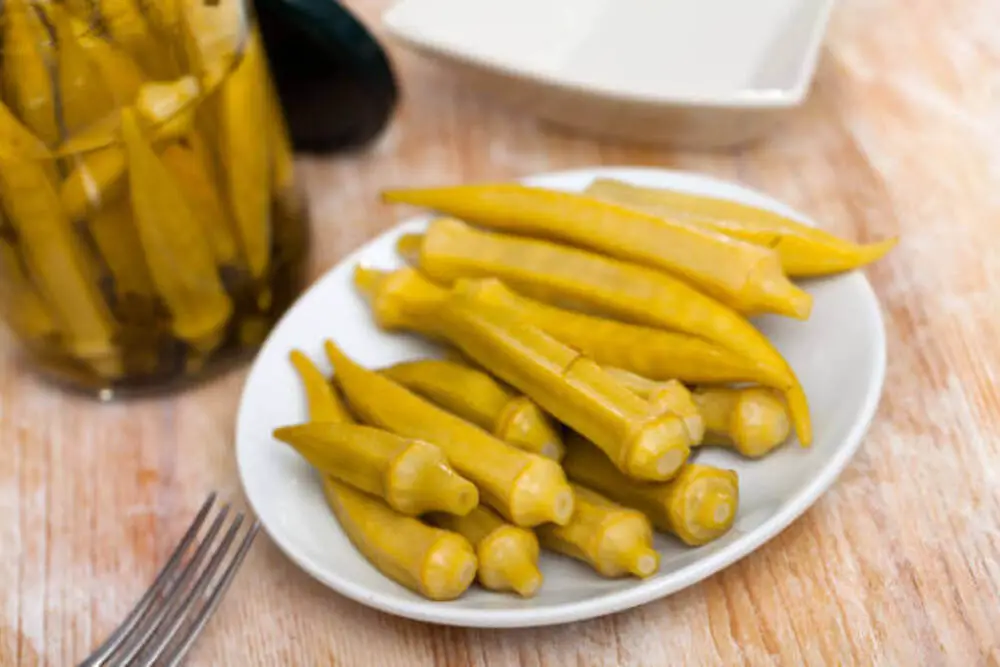
Pickled Okra Recipe
Pickling okra is a delightful way to preserve the vegetable’s unique flavor and texture. By immersing the okra pods in a tangy brine, you create a crunchy, zesty treat that can be enjoyed as a snack, side dish, or garnish. The pickling process not only extends the shelf life of okra but also enhances its taste, making it a versatile addition to your culinary repertoire.
Ingredients Needed
For this recipe, you’ll need a handful of key ingredients to create the perfect pickled okra.
- Essential Ingredients for Pickled Okra The primary ingredients include white vinegar (with 5% acidity), water, fresh okra pods, garlic cloves, canning salt, dill seed, and whole peppercorns. These components work together to create a harmonious balance of flavors, ensuring your pickled okra is both tasty and aromatic.
- Substitutions and Variations If you prefer a different flavor profile, you can experiment with various types of vinegar, such as apple cider or rice vinegar. Additionally, consider adding other spices or herbs like mustard seeds, coriander seeds, or bay leaves to customize your pickles to your taste.
Step-by-Step Instructions
Making pickled okra is a straightforward process, but it requires attention to detail to ensure the best results.
- Preparing Your Canning Equipment Start by sterilizing your jars, rings, and lids according to standard canning procedures. This step is crucial for preventing contamination and ensuring your pickles stay fresh.
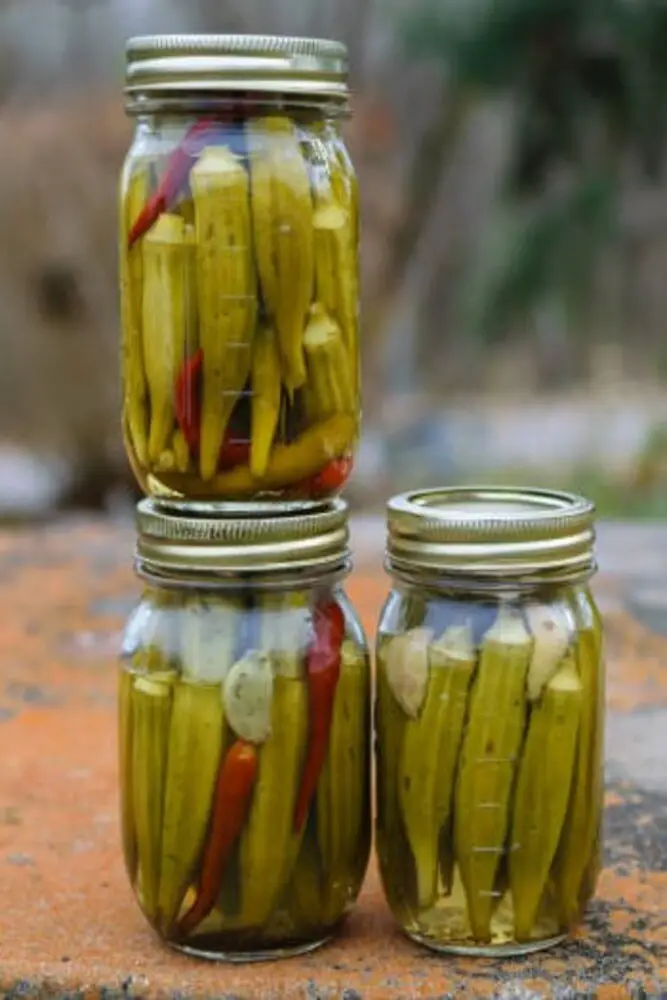
- Packing the Okra Pods Carefully pack the okra pods into each sterilized jar, positioning them with the tips facing upwards. This not only maximizes the space in the jar but also helps maintain the structural integrity of the okra.
- Adding Flavor: Garlic, Salt, Dill, and Peppercorns To each jar, add one clove of garlic, one teaspoon of canning salt, one teaspoon of dill seed, and a quarter teaspoon of whole peppercorns. These ingredients infuse the okra with a robust, savory flavor that complements its natural taste.
- Boiling the Vinegar and Water Mixture In a pot, bring the vinegar and water mixture to a rolling boil. This hot brine will be used to fill the jars, helping to preserve the okra and enhance its flavor.
- Sealing and Processing the Jars Fill the jars with the hot vinegar mixture, leaving about a quarter-inch space from the rim. Secure the lids and rings on the jars and process them in a boiling water bath for ten minutes to ensure they are properly sealed.
Recipe Tips & Frequently Asked Questions
- Selecting the Best Okra Pods Choose small, tender okra pods for the best texture and flavor. Larger pods can become tough and woody.
- Ensuring Proper Sterilization Sterilize your jars and equipment thoroughly to avoid any risk of contamination and spoilage.
- Achieving the Perfect Flavor Balance Adjust the amount of garlic, salt, and spices to suit your taste preferences.
- Storage and Shelf Life Store your pickled okra in a cool, dark place. Properly sealed jars can last for up to a year.
- Common Issues and Troubleshooting If your pickles turn cloudy, it may indicate spoilage. Ensure all equipment is sterile and that you follow the recipe accurately.
- Can I Use a Different Vinegar? Yes, but make sure it has at least 5% acidity to ensure proper preservation.
- How Long Will Pickled Okra Last? Properly canned pickled okra can last up to a year when stored in a cool, dark place.
- Do I Need to Refrigerate Pickled Okra? Unopened jars do not need refrigeration. Once opened, store them in the refrigerator.
What to Serve with This Recipe
Pickled okra can elevate a variety of dishes with its tangy crunch.
- Complementary Dishes and Pairings Serve pickled okra alongside sandwiches, burgers, or grilled meats. It’s also a fantastic addition to charcuterie boards and salads.
- Serving Suggestions for Different Occasions Use pickled okra as a garnish for cocktails like Bloody Marys, or as a unique topping for deviled eggs and tacos.
Variations and Creative Twists
Get creative with your pickled okra by trying out different flavors and ingredients.
- Spicy Pickled Okra Add some red pepper flakes or sliced jalapeños to the jars for a spicy kick.
- Herb-Infused Pickled Okra Experiment with fresh herbs like thyme, rosemary, or tarragon to add a fragrant touch.
- Adding Vegetables and Fruits Mix in other vegetables or fruits like carrots, onions, or even slices of apple for an intriguing twist on traditional pickled okra.
Making your own pickled okra is a rewarding and enjoyable culinary project.
- Enjoying Your Homemade Pickled Okra Relish the crisp, tangy flavor of your homemade pickled okra in a variety of dishes and snacks.
- Encouragement to Experiment with Flavors Don’t hesitate to personalize your pickles with different spices and ingredients. The possibilities are endless, and experimenting can lead to delicious discoveries.
Ingredients:
1 ½ cups white vinegar (5% acidity)
1 ½ cups water
2 pounds small, tender okra pods (amount may vary)
3 cloves garlic, peeled
3 teaspoons canning salt
3 teaspoons dill seed
¾ teaspoon whole peppercorns
Instructions:
- Begin by preparing your jars, rings, and lids following standard canning procedures to ensure they are sterile.
- In each sterilized jar, pack as many okra pods as possible, positioning them with the tips facing upwards.
Add to each jar: 1 clove of garlic, 1 teaspoon of canning salt, 1 teaspoon of dill seed, and ¼ teaspoon of whole 3. peppercorns. - Continue to fill the jars with more okra, this time with the tips pointing downwards, ensuring a tight fit without crushing the pods.
- In a pot, bring the vinegar and water mixture to a rolling boil. Carefully pour this hot liquid into the jars, leaving a ¼ inch space from the rim.
- Secure the lids and rings on the jars and process them in a boiling water bath for 10 minutes to seal.
- Once done, remove the jars from the canner and let them cool completely at room temperature.
- For the best flavor, allow the pickled okra to sit undisturbed for 4 to 6 weeks before consuming.
Pickled Okra Recipe
Ingredients
- 1 ½ cups white vinegar 5% acidity
- 1 ½ cups water
- 2 pounds small tender okra pods (amount may vary)
- 3 cloves garlic peeled
- 3 teaspoons canning salt
- 3 teaspoons dill seed
- ¾ teaspoon whole peppercorns
Instructions
- Begin by preparing your jars, rings, and lids following standard canning procedures to ensure they are sterile.
- In each sterilized jar, pack as many okra pods as possible, positioning them with the tips facing upwards.
- Add to each jar: 1 clove of garlic, 1 teaspoon of canning salt, 1 teaspoon of dill seed, and ¼ teaspoon of whole 3. peppercorns.
- Continue to fill the jars with more okra, this time with the tips pointing downwards, ensuring a tight fit without crushing the pods.
- In a pot, bring the vinegar and water mixture to a rolling boil. Carefully pour this hot liquid into the jars, leaving a ¼ inch space from the rim.
- Secure the lids and rings on the jars and process them in a boiling water bath for 10 minutes to seal.
- Once done, remove the jars from the canner and let them cool completely at room temperature.
- For the best flavor, allow the pickled okra to sit undisturbed for 4 to 6 weeks before consuming.
Notes
- When preparing the okra, trim the tops only if necessary. Avoid cutting into the body of the okra pod.
- Sterilize jars and rings following standard canning procedures:
- Wash them in hot, soapy water.
- Submerge in boiling water for a few minutes while you prepare the other ingredients.
- Use the canner water for this step.
- To prepare the lids:
- Wash and rinse them.
- Hold them in barely simmering water until neededAny jars that do not seal completely should be stored in the refrigerator and used first.