
Ladyfingers Recipe
Ladyfingers are a delightful, delicate treat, known for their airy texture and subtle sweetness. These sponge-like biscuits are the backbone of many iconic desserts, from the creamy layers of a traditional tiramisu to the fruit-filled decadence of a trifle. Their versatility and lightness make them a favorite component in various confections. Whether served on their own or as a building block for more elaborate creations, ladyfingers offer a perfect blend of simplicity and elegance, making them a must-have recipe in every baker’s repertoire.

Ingredients Overview
The success of this recipe hinges on the quality and balance of a few essential ingredients, each playing a critical role in achieving the signature lightness and structure of ladyfingers.
Egg whites are the true star of this recipe, providing structure and airiness to the biscuits. Beaten to glossy peaks, they trap air, helping the batter rise and giving the ladyfingers their trademark sponge-like texture. In contrast, the egg yolks contribute richness, adding depth of flavor and a tender crumb to the biscuits.
Granulated sugar is used in two stages, not just to sweeten, but also to stabilize both the yolks and whites as they are beaten. This ensures a silky, well-balanced batter. The combination of flour and cornstarch delivers the perfect texture. Flour provides structure, while the cornstarch lightens the overall feel, ensuring that the biscuits remain soft yet hold their shape. Finally, a touch of vanilla extract rounds out the flavor, adding a gentle sweetness and enhancing the overall taste of the ladyfingers.
Step-by-Step Instructions
Creating ladyfingers from scratch is a rewarding process that results in light, airy biscuits with a golden finish. The steps below break down the process into manageable stages, ensuring success for any baker.
Begin by preparing your workspace. Preheat your oven to 350°F (175°C), ensuring it reaches the proper temperature while you prepare the batter. Line two large baking trays with parchment paper, and set up a piping bag fitted with a round piping tip, which will give the ladyfingers their uniform shape.
Start by whisking the egg yolks with ¼ cup of the sugar, vanilla extract, and salt. Beat the mixture until it becomes pale and creamy—this will take a few minutes. The sugar helps stabilize the yolks, creating a rich, velvety base. In a separate bowl, whip the egg whites. Start on low speed, gradually increasing to high as soft peaks form. As you beat, add the remaining ¼ cup of sugar in increments, creating a thick, glossy meringue.
Once the whites are perfectly whipped, gently fold them into the yolk mixture in batches, being careful not to deflate the batter. Sift the flour and cornstarch over the mixture, folding until no dry pockets remain. The batter should be light, airy, and slightly lumpy. Transfer it to the prepared piping bag and pipe 4-inch (10 cm) logs onto the baking sheets, spacing them about 2 inches apart. Dust the tops with powdered sugar for a delicate crust.
Bake the ladyfingers for 12-15 minutes, or until they are lightly golden and firm to the touch. Allow them to cool completely on the tray before removing them. Once cool, they are ready to be used in desserts or stored for later use.
Recipe Tips & Frequently Asked Questions
Fold the batter gently:
To keep the ladyfingers light and airy, fold the egg whites into the yolk mixture with a soft hand. Over-mixing can cause the batter to deflate, resulting in denser biscuits.
Avoid over-mixing:
The batter should remain somewhat lumpy—this ensures that the structure holds, and the biscuits will be soft and sponge-like.
Dust with powdered sugar:
Generously dusting the tops with powdered sugar before baking not only adds sweetness but also helps create a delicate, crisp crust.
Pipe evenly shaped ladyfingers:
Aim for uniform size when piping the batter onto the baking sheets. This ensures even baking and a consistent final product.
Can I freeze ladyfingers?
Yes, ladyfingers freeze well. Once cooled, layer them between sheets of parchment paper in an airtight container and freeze for up to a month.
What should I do if my ladyfingers turn out too soft?
If your ladyfingers are too soft, try baking them for a few minutes longer until they turn golden and feel firm to the touch.
Can I use this recipe to make a gluten-free version?
Yes, you can substitute the all-purpose flour with a gluten-free flour blend to create a gluten-free version of ladyfingers.
What are some substitutes for cornstarch?
If you don’t have cornstarch, you can replace it with potato starch or even more all-purpose flour, though the texture may differ slightly.
What to Serve With This Recipe
Ladyfingers are incredibly versatile and can be served in a variety of ways. One of the most popular uses for these biscuits is in tiramisu, where they are soaked in coffee and layered with rich mascarpone cream. Their absorbent texture makes them perfect for soaking up flavorful liquids while maintaining their structure. For a lighter dessert, consider using them in fruit trifles, layering them with whipped cream and fresh fruits like strawberries, raspberries, or peaches.
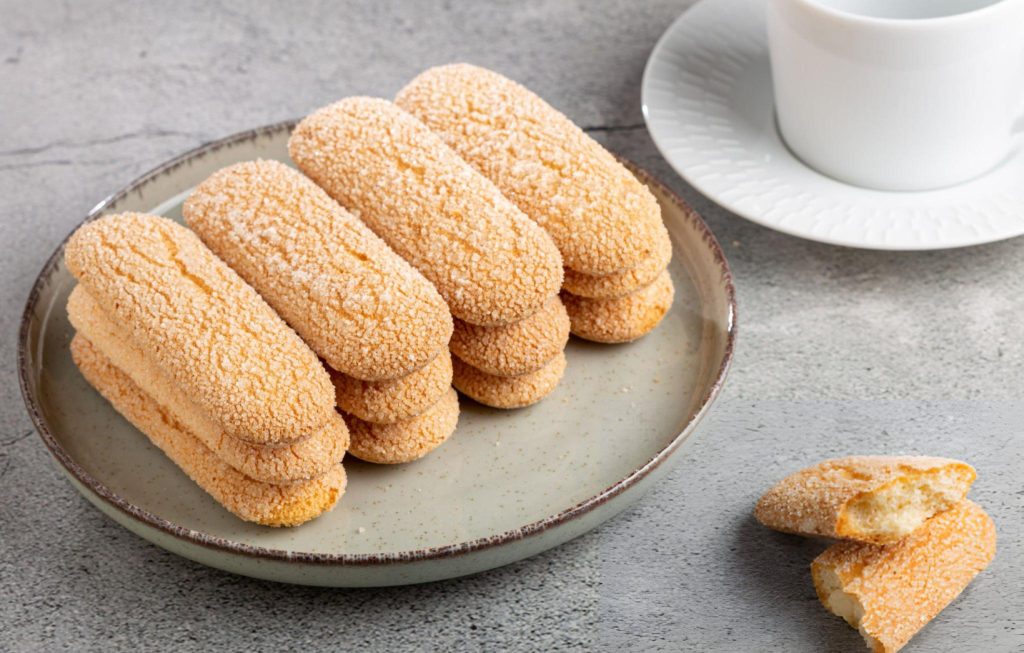
If you’re in the mood for something simple, enjoy the ladyfingers on their own with a dusting of powdered sugar, alongside a cup of coffee or tea. Their light, sweet flavor pairs wonderfully with hot beverages, making them an ideal afternoon snack or dessert companion.
Storage and Shelf Life
To keep your ladyfingers fresh and crisp, store them in an airtight container at room temperature. They can remain fresh for up to two weeks, though their texture will gradually soften the longer they are exposed to air. If you’re looking to make them in advance or keep them on hand for longer periods, they freeze exceptionally well.
For freezing, allow the biscuits to cool completely before transferring them to an airtight container. Layer them between sheets of parchment paper to prevent sticking, and freeze for up to one month. When ready to use, simply thaw them at room temperature. If they’ve lost a bit of their crispness, a few minutes in a warm oven should revive their texture.
Ladyfingers are a delightful addition to any baker’s repertoire, offering a light and airy biscuit that’s as versatile as it is delicious. Whether you’re crafting an elegant tiramisu or simply enjoying them with coffee, these biscuits provide a perfect balance of sweetness and texture. Once you’ve mastered this recipe, you’ll find endless ways to incorporate these delicate treats into your favorite desserts. Give them a try, and let your creativity shine through in how you choose to serve and enjoy them!
Ingredients
3 large egg whites
3 large egg yolks, separated
½ cup granulated sugar, divided (100g)
½ teaspoon vanilla extract
¼ teaspoon salt
1 cup all-purpose flour (120g)
5 teaspoons cornstarch
Powdered sugar for dusting
Instructions
Begin by preheating your oven to 350°F (175°C). Prepare two large baking trays by lining them with parchment paper. Fit a large piping bag with a round piping tip.
In a large mixing bowl, whisk together the egg yolks, ¼ cup of the sugar, vanilla extract, and salt. Continue beating on medium speed until the mixture becomes pale and creamy.
In a separate clean bowl, whip the egg whites until they form soft peaks. Gradually add the remaining ¼ cup of sugar, one spoonful at a time, while continuing to beat on high speed. Whip until the egg whites turn glossy and thick, which should take around 2 minutes.
Give the egg yolk mixture a quick whisk to re-incorporate, then gently fold the whipped egg whites into the yolk mixture in portions. Once the egg whites are fully integrated, sift the flour and cornstarch over the mixture. Carefully fold until the dry ingredients are just combined, avoiding over-mixing, even if the batter appears slightly lumpy. Transfer the mixture to the prepared piping bag.
Pipe the batter into 4-inch (10cm) logs on the baking sheets, leaving about 2 inches (5cm) of space between each log. Generously dust one of the baking sheets with powdered sugar.
Place the dusted tray in the oven and bake for 12-15 minutes, or until the ladyfingers turn a light golden hue and feel firm to the touch. Allow them to cool completely on the tray. Repeat the process with the second baking sheet, dusting with powdered sugar before baking.
Once cooled, the ladyfingers are ready to be used or stored. For best results, store them in an airtight container at room temperature, where they will stay fresh for up to two weeks. Keep in mind that exposure to air will soften them over time.
Ladyfingers Recipe
Ingredients
- 3 large egg whites
- 3 large egg yolks separated
- ½ cup granulated sugar divided (100g)
- ½ teaspoon vanilla extract
- ¼ teaspoon salt
- 1 cup all-purpose flour 120g
- 5 teaspoons cornstarch
- Powdered sugar for dusting
Instructions
- Begin by preheating your oven to 350°F (175°C). Prepare two large baking trays by lining them with parchment paper. Fit a large piping bag with a round piping tip.
- In a large mixing bowl, whisk together the egg yolks, ¼ cup of the sugar, vanilla extract, and salt. Continue beating on medium speed until the mixture becomes pale and creamy.
- In a separate clean bowl, whip the egg whites until they form soft peaks. Gradually add the remaining ¼ cup of sugar, one spoonful at a time, while continuing to beat on high speed. Whip until the egg whites turn glossy and thick, which should take around 2 minutes.
- Give the egg yolk mixture a quick whisk to re-incorporate, then gently fold the whipped egg whites into the yolk mixture in portions. Once the egg whites are fully integrated, sift the flour and cornstarch over the mixture. Carefully fold until the dry ingredients are just combined, avoiding over-mixing, even if the batter appears slightly lumpy. Transfer the mixture to the prepared piping bag.
- Pipe the batter into 4-inch (10cm) logs on the baking sheets, leaving about 2 inches (5cm) of space between each log. Generously dust one of the baking sheets with powdered sugar.
- Place the dusted tray in the oven and bake for 12-15 minutes, or until the ladyfingers turn a light golden hue and feel firm to the touch. Allow them to cool completely on the tray. Repeat the process with the second baking sheet, dusting with powdered sugar before baking.
- Once cooled, the ladyfingers are ready to be used or stored. For best results, store them in an airtight container at room temperature, where they will stay fresh for up to two weeks. Keep in mind that exposure to air will soften them over time.
Notes
- Dust the dough with confectioners’ sugar before baking to help the cookies rise and stay airy.
- For a softer cookie, bake for a shorter time; for a crispier, more golden cookie, bake longer. If using in tiramisu, crisper cookies soak up the coffee syrup better.
- Measure flour accurately to avoid drying out the dough. Use a kitchen scale or fluff the flour before spooning and leveling it in your measuring cup.
- Ensure the bowl for whipping egg whites is clean and dry, with no yolk present. Avoid plastic bowls, as they can retain grease.
- Separate eggs when cold but allow egg whites to come to room temperature for better volume.
- Fold the egg whites into the batter gently using a cutting motion to keep them airy.
- For uniform ladyfingers, use a template under the parchment paper, but remove it before baking.