
Key Lime Pie Recipe
Key Lime Pie is a timeless dessert that evokes the sunny warmth of the Florida Keys with every bite. Its unique combination of tangy key lime juice and sweet, creamy filling makes it a standout treat that’s beloved by many. This particular recipe is not only delicious but also remarkably simple to prepare, making it a perfect choice for both novice bakers and seasoned pros looking to impress.
The allure of this Key Lime Pie lies in its perfect balance of tartness and sweetness, coupled with a smooth texture that contrasts beautifully with the crunchy graham cracker crust. Whether you’re serving it at a casual family gathering or a sophisticated dinner party, this pie is sure to be a hit.
Ingredients
This recipe calls for:
- 1 tablespoon grated lime zest
- ½ cup sour cream
- ¾ cup key lime juice
- 3 cups sweetened condensed milk
- 1 (9 inch) prepared graham cracker crust
Each ingredient plays a crucial role. The lime zest adds a burst of citrusy aroma, while the sour cream introduces a slight tang that complements the key lime juice’s acidity. The sweetened condensed milk provides the necessary sweetness and creamy texture, and the graham cracker crust offers a delightful crunchy base that holds everything together.
Step-by-Step Instructions
To start, gather all the ingredients and preheat your oven to 350 degrees F (175 degrees C). This initial step ensures that everything is ready to go and that your oven is at the perfect temperature for baking.
In a large mixing bowl, combine the sweetened condensed milk, key lime juice, sour cream, and lime zest. Mix these ingredients thoroughly until the filling is smooth and well-blended. This mixture will form the heart of your pie, so take your time to ensure it’s perfectly combined.
Pour the filling into the prepared graham cracker crust, ensuring an even distribution. Place the pie on a baking sheet to provide stability during baking.
Bake the pie in the preheated oven for 5 to 8 minutes. You’ll know it’s done when you see tiny pinhole bubbles forming and popping on the surface. The filling should remain slightly wobbly, indicating that it is set but not overcooked. Avoid browning the surface, as this can affect the pie’s delicate flavor.
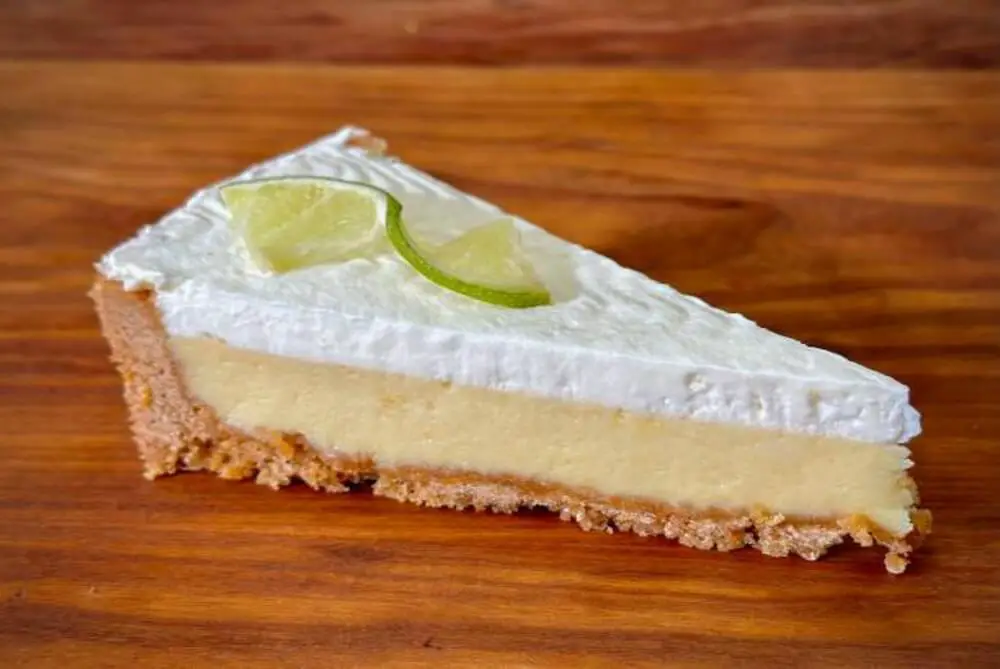
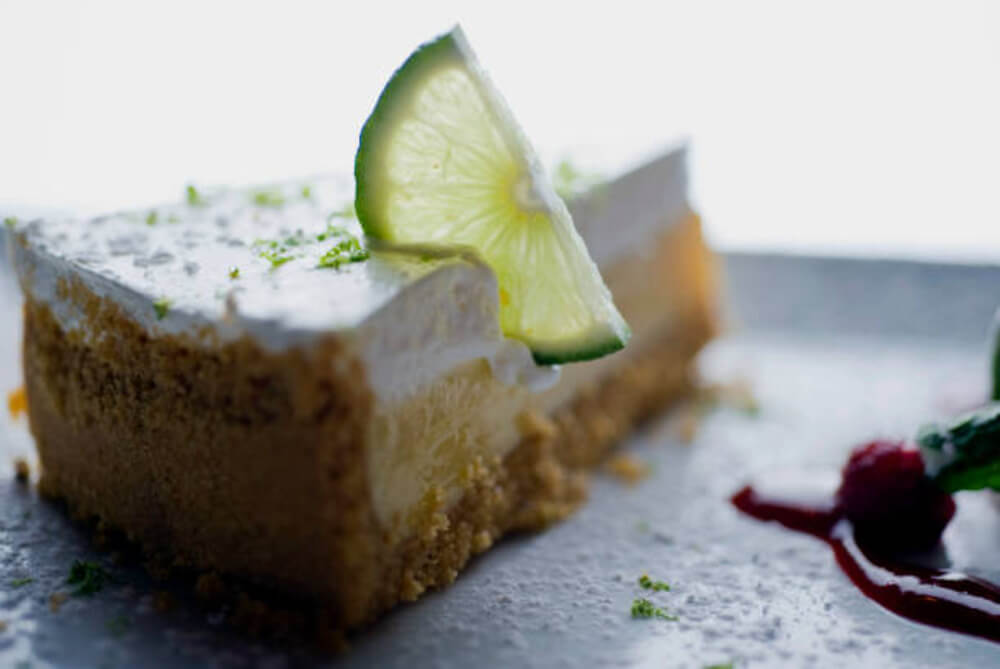
After baking, transfer the pie to a wire rack to cool to room temperature. Once cooled, place it in the refrigerator to chill completely, which will take about an hour. This chilling step is essential as it allows the flavors to meld and the filling to set perfectly. Before serving, you can garnish with lime slices and a dollop of whipped cream for an extra touch of elegance.
Recipe Tips
- For the perfect consistency, ensure that your lime juice is freshly squeezed and your sour cream is at room temperature.
- If you can’t find key limes, regular limes can be used as a substitute, though the flavor will be slightly different.
- Avoid overmixing the filling to prevent it from becoming too airy and losing its creamy texture.
What to Serve With This Recipe
A well-chosen beverage can elevate your Key Lime Pie experience. Consider serving it with a chilled glass of sparkling water or a light, crisp white wine like Sauvignon Blanc. For a non-alcoholic option, a refreshing iced tea with a hint of mint complements the pie beautifully.
Pairing the pie with complementary desserts can create a delightful dessert spread. Fresh fruit salads or light sorbets work wonderfully alongside this rich pie, providing a refreshing contrast. This pie is also perfect for any occasion, from casual picnics to elegant dinner parties.
Presentation and Garnishing Ideas
To make your pie visually appealing, consider creative garnishing. Thin slices of lime arranged in a circular pattern on top of the pie add a decorative touch. A sprinkle of additional lime zest can enhance both the flavor and appearance. For serving, use clean, even slices and place each piece on a plate with a dollop of whipped cream on the side. These small details can make your homemade pie look restaurant-quality.
Storage and Shelf Life
Proper storage is crucial to maintain the freshness of your Key Lime Pie. Cover the pie with plastic wrap or store it in an airtight container and keep it in the refrigerator. The pie can stay fresh for up to 3 days when stored correctly. If you need to reheat it, do so gently to avoid altering the texture of the filling.
Recipe Tips & Frequently Asked Questions
- For a silky smooth filling, ensure all ingredients are well-mixed without overmixing.
- If key limes are unavailable, regular limes can be used as a substitute, though the flavor profile will differ slightly.
- To avoid common mistakes, ensure the pie is baked until tiny bubbles form without browning, and allow it to chill completely before serving.
Can I Use Regular Limes Instead of Key Limes? Yes, regular limes can be used, but key limes have a unique flavor that is more aromatic and slightly more tart.
How Do I Know When the Pie is Done? The pie is done when you see tiny pinhole bubbles forming and popping on the surface, and the filling remains slightly wobbly.
Can I Make This Pie Ahead of Time? Absolutely! This pie can be made a day in advance and stored in the refrigerator until ready to serve.
What is the Best Way to Store Leftovers? Store leftovers in the refrigerator, covered with plastic wrap or in an airtight container, for up to 3 days.
Ingredients
1 tablespoon grated lime zest
½ cup sour cream
¾ cup key lime juice
3 cups sweetened condensed milk
1 (9 inch) prepared graham cracker crust
Instructions
- Begin by assembling all the necessary ingredients and preheating your oven to 350 degrees F (175 degrees C).
- In a mixing bowl, blend the sweetened condensed milk, key lime juice, sour cream, and lime zest until thoroughly combined. Pour this mixture into the prepared graham cracker crust and set the pie on a baking sheet for stability.
- Bake the pie in the preheated oven for 5 to 8 minutes, or until you notice tiny pinhole bubbles forming and popping on the surface. The pie’s filling should remain slightly wobbly without browning.
- Once baked, place the pie on a wire rack to cool to room temperature. After it has cooled, transfer the pie to the refrigerator to chill completely, which should take about an hour. For an extra touch, garnish with lime slices and a dollop of whipped cream before serving.
Key Lime Pie Recipe
Ingredients
- 1 tablespoon grated lime zest
- ½ cup sour cream
- ¾ cup key lime juice
- 3 cups sweetened condensed milk
- 1 9 inch prepared graham cracker crust
Instructions
- Begin by assembling all the necessary ingredients and preheating your oven to 350 degrees F (175 degrees C).
- In a mixing bowl, blend the sweetened condensed milk, key lime juice, sour cream, and lime zest until thoroughly combined. Pour this mixture into the prepared graham cracker crust and set the pie on a baking sheet for stability.
- Bake the pie in the preheated oven for 5 to 8 minutes, or until you notice tiny pinhole bubbles forming and popping on the surface. The pie’s filling should remain slightly wobbly without browning.
- Once baked, place the pie on a wire rack to cool to room temperature. After it has cooled, transfer the pie to the refrigerator to chill completely, which should take about an hour. For an extra touch, garnish with lime slices and a dollop of whipped cream before serving.