
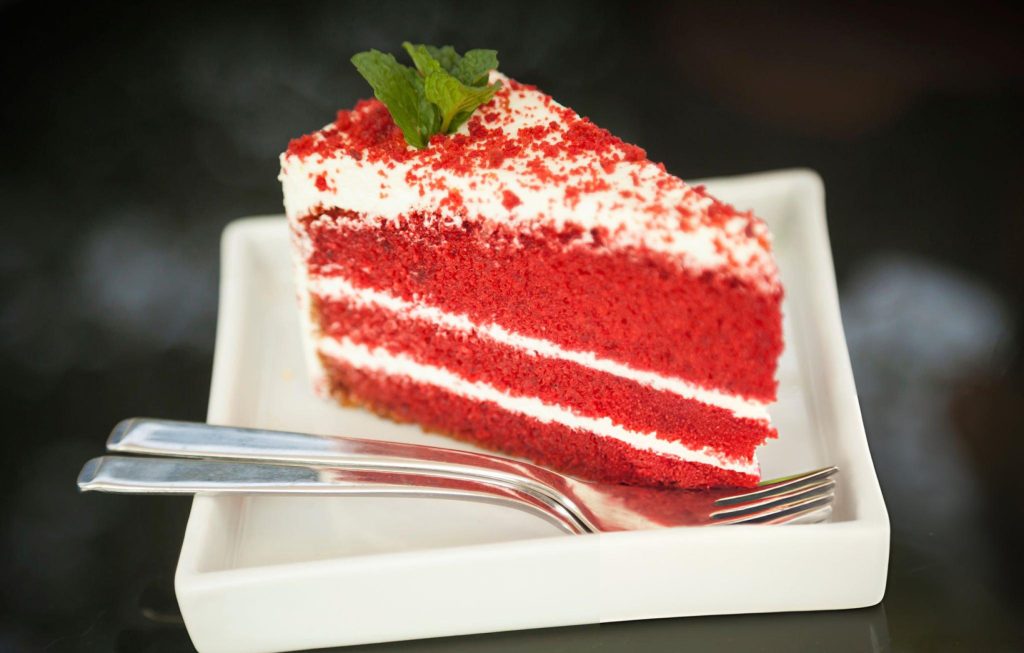
Red Velvet Cake Recipe
Red Velvet Cake stands out as a beloved classic in the world of desserts. Its eye-catching red hue and sumptuous cream cheese frosting make it a favorite at celebrations and gatherings. The combination of the cake’s subtle chocolate flavor with the tangy cream cheese frosting creates a delightful harmony that is hard to resist.
Ingredients and Equipment
Crafting the perfect Red Velvet Cake requires a precise blend of ingredients and the right tools. For the cake, you will need dry ingredients such as 2 1/4 cups (279 grams) of all-purpose flour, 1/2 teaspoon of baking powder, 1 teaspoon of baking soda, 1 teaspoon of fine sea salt, and 1/4 teaspoon of ground cinnamon (optional). The wet ingredients include 1/2 cup of plain hot coffee or boiling water, 1/4 cup (21 grams) of unsweetened natural cocoa powder, 2 cups (400 grams) of granulated sugar, 1/2 cup (109 grams) of fresh vegetable oil, 1 stick (113 grams) of melted unsalted butter, 2 large eggs at room temperature, 1 large egg yolk at room temperature, 1 cup of buttermilk at room temperature, 2 teaspoons of vanilla extract, 3 teaspoons of red gel food coloring (plus more if needed), and 1 teaspoon of distilled white vinegar. For the cream cheese frosting, gather 16 ounces (454 grams) of cream cheese at room temperature, 2 sticks (227 grams) of unsalted butter at room temperature, 2 teaspoons of vanilla extract, and 4 cups (500 grams) of sifted powdered sugar. The essential equipment and tools required include three 8-inch cake pans, parchment paper, nonstick cooking spray, a glass measuring cup, medium and large mixing bowls, a fine mesh sieve, a stand mixer with a paddle attachment, wire racks, and a cake plate or pedestal.
Step-by-Step Instructions
Preparing the Cake Batter
To begin, preheat your oven to 325°F and prepare the cake pans by lining them with parchment rounds and generously spraying with nonstick cooking spray. In a glass measuring cup, mix the hot coffee and cocoa powder, then cover and let it sit for 5 minutes to develop a rich chocolate flavor.
In a medium mixing bowl, whisk together the flour, baking powder, baking soda, salt, and optional cinnamon to ensure even distribution of the leavening agents.
In a large mixing bowl, combine the sugar, vegetable oil, and melted butter, whisking until the mixture is smooth and well-integrated. Add the eggs and egg yolk, beating vigorously for about twenty seconds. Pour in the buttermilk, vanilla extract, and food coloring, mixing well to achieve a vibrant red hue. Stir in the vinegar and the coffee-cocoa mixture.
Gradually sift the flour mixture into the wet ingredients, adding it in three parts and whisking thoroughly after each addition to ensure a lump-free batter.
Baking the Cake Layers
Divide the batter evenly among the prepared cake pans. Tap the bottoms of the pans on the counter several times to release any trapped air bubbles, which helps achieve an even texture.
Bake the cakes for 25 to 30 minutes, or until a cake tester or toothpick inserted into the center comes out clean. The cakes may appear slightly spongy on top, which is normal. Allow the cakes to cool in the pans on wire racks. Once cool enough to handle, run a thin knife around the edges to loosen them, then invert the cakes onto the racks to cool completely.
Making the Cream Cheese Frosting
In the bowl of a stand mixer fitted with the paddle attachment, beat the cream cheese and butter on medium-high speed until the mixture is very light, creamy, and smooth. It is crucial to scrape down the sides and bottom of the bowl to ensure no lumps remain.
Add the vanilla extract and continue to beat until fully combined. Gradually incorporate the sifted powdered sugar on low speed. Once all the sugar is added, increase the speed and beat until the frosting is fluffy, about 3 minutes. Adjust the consistency by adding a splash of milk or cream if too thick, or more powdered sugar if too thin.
Assembling the Red Velvet Cake
Place one cake layer flat-side up on a cake plate or pedestal. To keep the plate clean while frosting, tuck strips of baking paper under the edges of the cake. Spread about a third of the frosting over the bottom cake layer, then top with the second layer and repeat the process. Place the final layer flat-side up.
Use the remaining frosting to ice the entire cake, ensuring an even and smooth finish. The finished cake can be stored covered in the refrigerator for up to 3 days, maintaining its moist texture and delicious flavor.
Recipe Tips & Frequently Asked Questions
Tips for Achieving the Perfect Red Velvet Color
- Use high-quality red gel food coloring to achieve a vibrant hue.
- Incorporate the coloring gradually to control the intensity of the red.
Suggestions for Ensuring Moist and Tender Cake Layers
- Do not overmix the batter to prevent a dense texture.
- Ensure all wet ingredients are at room temperature for a smooth batter.
Frosting Tips for a Smooth and Professional Finish
- Beat the frosting until it is light and airy.
- Use a bench scraper for a smooth cake surface.
Storage and Make-Ahead Tips
- Store the cake in an airtight container in the refrigerator.
- The cake can be made a day in advance and assembled just before serving.
Common Substitutions and Alternatives
- Substitute buttermilk with a mixture of milk and lemon juice or vinegar.
- Use natural cocoa powder for an authentic flavor.
Gluten-Free, Dairy-Free Options
- Replace all-purpose flour with a gluten-free flour blend.
- Use dairy-free cream cheese and butter for the frosting.
Troubleshooting Baking Issues
- If the cake is too dense, ensure proper measurement of ingredients.
- If the cake is dry, avoid overbaking and check oven temperature accuracy.
What to Do If the Cake Is Too Dense or Dry
- Brush the cake layers with a simple syrup to add moisture.
- Layer with additional frosting to enhance the texture.
Shelf Life and Storage
- Best enjoyed within 3 days of baking.
- Store leftovers in the refrigerator to maintain freshness.
Best Practices for Storing Leftovers
- Wrap slices in plastic wrap and store in an airtight container.
- Allow the cake to come to room temperature before serving.
What to Serve With This Recipe
Beverage Pairings
The rich flavors of Red Velvet Cake pair wonderfully with a variety of beverages. Coffee and tea are classic choices, enhancing the cake’s subtle cocoa undertones. For a more decadent experience, consider serving with a glass of red wine, such as a smooth Merlot or a robust Cabernet Sauvignon.
Complementary Desserts and Sides
Complement the cake with light and refreshing desserts like vanilla ice cream or a simple fruit compote. These additions balance the richness of the cake and add a delightful contrast to its creamy frosting.
This Red Velvet Cake recipe is a perfect addition to any celebration, offering a visually stunning and deliciously moist dessert. With its vibrant color and rich flavor, it’s sure to impress your guests and become a favorite in your recipe collection. Enjoy the process of baking and savoring this classic cake!
Ingredients
For the cake:
- 2 1/4 cups (279 grams) all-purpose flour
- 1/2 cup of plain hot coffee or boiling water
- 1/4 cup (21 grams) unsweetened natural cocoa powder
- 1/2 teaspoon baking powder
- 1 teaspoon baking soda
- 1 teaspoon fine sea salt
- 1/4 teaspoon ground cinnamon, optional
- 2 cups (400 grams) granulated sugar
- 1/2 cup (109 grams) fresh vegetable oil
- 1 stick (113 grams) unsalted butter, melted
- 2 large eggs, at room temperature
- 1 large egg yolk, at room temperature
- 1 cup buttermilk, at room temperature
- 2 teaspoons vanilla extract
- 3 teaspoons red gel food coloring, plus more if needed*
- 1 teaspoon distilled white vinegar
For the cream cheese frosting:
- 16 ounces (454 grams) cream cheese, at room temperature
- 2 sticks (227 grams) unsalted butter, at room temperature
- 2 teaspoons vanilla extract
- 4 cups (500 grams) powdered sugar, sifted
Instructions
For the cake:
- Preheat your oven to 325°F. Prepare three 8-inch cake pans by lining them with parchment rounds and generously spraying the parchment and sides with nonstick cooking spray.
- In a glass measuring cup, mix the hot coffee and cocoa powder, then cover and let it sit for 5 minutes.
- In a medium-sized mixing bowl, whisk together the flour, baking powder, baking soda, salt, and cinnamon.
- In a large mixing bowl, combine the sugar, vegetable oil, and melted butter, whisking until very well mixed. Add the eggs and egg yolk, whisking vigorously for about twenty seconds. Pour in the buttermilk, vanilla extract, and food coloring, and mix well. Stir in the vinegar and coffee-cocoa mixture.
- Gradually sift the flour mixture into the batter using a fine mesh sieve, adding it in three parts and whisking well after each addition.
- Evenly divide the batter among the prepared cake pans. Tap the bottoms of the pans on the counter several times to release any trapped air bubbles.
- Bake for 25 to 30 minutes, or until a cake tester or toothpick inserted into the center comes out clean. It’s normal for the cakes to appear slightly spongy on top. Allow the cakes to cool in the pans on wire racks. Once cool enough to handle, run a thin knife around the edges to loosen the cakes, then invert them onto the racks to cool completely.
For the frosting:
- In the bowl of a stand mixer fitted with the paddle attachment, beat the cream cheese and butter on medium-high speed until the mixture is very light, creamy, and smooth. Scrape down the sides and bottom of the bowl to ensure there are no lumps.
- Add the vanilla extract and beat until combined. On low speed, gradually incorporate the sifted powdered sugar and beat until the frosting is fluffy, about 3 minutes. Adjust the consistency if needed by adding a splash of milk or cream if too thick, or more powdered sugar if too thin.
To assemble:
- Place one cake layer flat-side up on a cake plate or pedestal. Tuck strips of baking paper under the edges of the cake to keep the plate clean while frosting.
- Spread about a third of the frosting over the bottom cake layer, then top with the second layer and repeat the process. Place the final layer flat-side up.
- Use the remaining frosting to ice the entire cake. The finished cake can be stored covered in the refrigerator for up to 3 days.
Red Velvet Cake Recipe
Ingredients
For the cake:
- 2 1/4 cups 279 grams all-purpose flour
- 1/2 cup of plain hot coffee or boiling water
- 1/4 cup 21 grams unsweetened natural cocoa powder
- 1/2 teaspoon baking powder
- 1 teaspoon baking soda
- 1 teaspoon fine sea salt
- 1/4 teaspoon ground cinnamon optional
- 2 cups 400 grams granulated sugar
- 1/2 cup 109 grams fresh vegetable oil
- 1 stick 113 grams unsalted butter, melted
- 2 large eggs at room temperature
- 1 large egg yolk at room temperature
- 1 cup buttermilk at room temperature
- 2 teaspoons vanilla extract
- 3 teaspoons red gel food coloring plus more if needed*
- 1 teaspoon distilled white vinegar
For the cream cheese frosting:
- 16 ounces 454 grams cream cheese, at room temperature
- 2 sticks 227 grams unsalted butter, at room temperature
- 2 teaspoons vanilla extract
- 4 cups 500 grams powdered sugar, sifted
Instructions
For the cake:
- Preheat your oven to 325°F. Prepare three 8-inch cake pans by lining them with parchment rounds and generously spraying the parchment and sides with nonstick cooking spray.
- In a glass measuring cup, mix the hot coffee and cocoa powder, then cover and let it sit for 5 minutes.
- In a medium-sized mixing bowl, whisk together the flour, baking powder, baking soda, salt, and cinnamon.
- In a large mixing bowl, combine the sugar, vegetable oil, and melted butter, whisking until very well mixed. Add the eggs and egg yolk, whisking vigorously for about twenty seconds. Pour in the buttermilk, vanilla extract, and food coloring, and mix well. Stir in the vinegar and coffee-cocoa mixture.
- Gradually sift the flour mixture into the batter using a fine mesh sieve, adding it in three parts and whisking well after each addition.
- Evenly divide the batter among the prepared cake pans. Tap the bottoms of the pans on the counter several times to release any trapped air bubbles.
- Bake for 25 to 30 minutes, or until a cake tester or toothpick inserted into the center comes out clean. It’s normal for the cakes to appear slightly spongy on top. Allow the cakes to cool in the pans on wire racks. Once cool enough to handle, run a thin knife around the edges to loosen the cakes, then invert them onto the racks to cool completely.
For the frosting:
- In the bowl of a stand mixer fitted with the paddle attachment, beat the cream cheese and butter on medium-high speed until the mixture is very light, creamy, and smooth. Scrape down the sides and bottom of the bowl to ensure there are no lumps.
- Add the vanilla extract and beat until combined. On low speed, gradually incorporate the sifted powdered sugar and beat until the frosting is fluffy, about 3 minutes. Adjust the consistency if needed by adding a splash of milk or cream if too thick, or more powdered sugar if too thin.
To assemble:
- Place one cake layer flat-side up on a cake plate or pedestal. Tuck strips of baking paper under the edges of the cake to keep the plate clean while frosting.
- Spread about a third of the frosting over the bottom cake layer, then top with the second layer and repeat the process. Place the final layer flat-side up.
- Use the remaining frosting to ice the entire cake. The finished cake can be stored covered in the refrigerator for up to 3 days.