
Strawberry Jam Scones Recipe
Scones are a delightful treat, perfect for any time of the day. This recipe is straightforward and yields tender, fluffy scones that are sure to impress. Whether you’re hosting a tea party or simply enjoying a quiet afternoon, these scones are the perfect addition to your table. The simplicity of the ingredients and the ease of preparation make this recipe accessible for both novice and experienced bakers.

Ingredients and Preparation
For this recipe, you’ll need self-raising flour, cold salted butter, and cold milk. Additionally, you’ll need extra flour for dusting and extra milk for brushing the scones before baking. For serving, gather some strawberry jam, whipping cream, white sugar, and vanilla extract. These simple ingredients come together to create a delicious and versatile scone.
To ensure the best results, it’s crucial to use cold butter and milk. The cold butter helps create the flaky texture that scones are known for. When cutting the butter into the flour, aim for a breadcrumb-like consistency. This can be achieved using a food processor, which makes the process quick and easy.
Step-by-Step Instructions
Begin by preheating your oven to 200°C/390°F for a standard oven or 180°C/350°F if using a fan/convection oven. This ensures the scones bake evenly and achieve the desired rise and golden color.
Next, place the self-raising flour into a food processor and add the cubed cold butter. Pulse on high for about 8 seconds until the mixture resembles breadcrumbs. This step is crucial for incorporating the butter evenly throughout the flour, creating the perfect base for your scones.
Pour the cold milk evenly over the flour mixture. Avoid pouring it all in one spot to ensure even distribution. Blitz on high for another 6 to 8 seconds until the mixture starts forming dough balls. This quick mixing prevents overworking the dough, which can make the scones tough.
Transfer the dough onto a clean work surface, scraping out any remaining bits from the food processor. Gently knead the dough no more than 10 times, just until it comes together into a smooth ball. Pat the dough into a disc about 2 cm thick. If needed, lightly dust with extra flour to prevent sticking.
For a smoother top, gently roll a rolling pin over the dough. Dip a 5 cm round cutter into extra flour and press it straight down into the dough, lifting it out without twisting. This technique ensures clean cuts and helps the scones rise evenly. Carefully transfer the cut scones to a baking tray, taking care not to press or smear the sides.
Gather any remaining dough scraps and repeat the cutting process until you have about 10 scones. Optionally, brush the tops lightly with milk for a beautiful golden finish. Bake the scones for 10 to 12 minutes until the tops are golden and they sound hollow when tapped. Remove from the oven and transfer to a dish towel, wrapping them loosely to keep the tops soft. Once cooled to a warm temperature, they are ready to serve.
Recipe Tips & Frequently Asked Questions
- How to achieve the perfect texture: Use cold ingredients and handle the dough as little as possible to keep the scones light and fluffy.
- Common mistakes to avoid: Overmixing the dough can make scones dense. Also, twisting the cutter can seal the edges and prevent proper rising.
- Adjusting the recipe for different dietary needs: Substitute gluten-free self-raising flour for a gluten-free version or use dairy-free butter and milk for a dairy-free option.
- Can I freeze scones? Yes, you can freeze scones before baking. Once cut, place them on a baking tray to freeze individually before transferring them to a freezer bag.
- How do I make scones gluten-free? Replace self-raising flour with a gluten-free blend and add 1 tsp of baking powder.
- What are some alternative toppings for scones? In addition to traditional jam and cream, try honey, lemon curd, or even savory toppings like cheese and chive butter.
Serving Suggestions
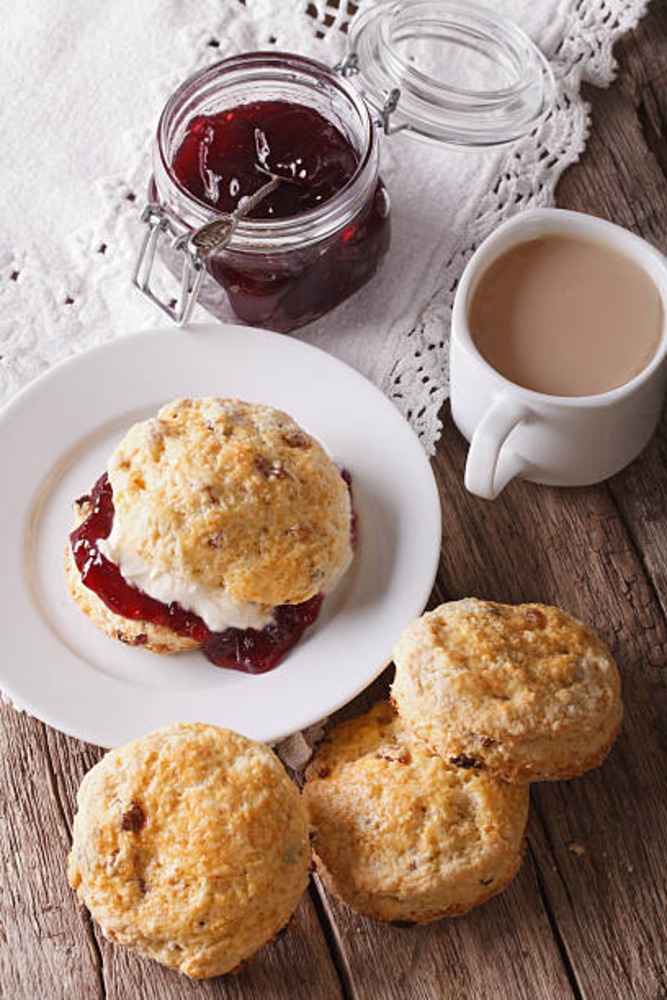
When it comes to enjoying scones, the classic combination of strawberry jam and freshly whipped cream is hard to beat. However, feel free to experiment with other flavors of jam such as raspberry, apricot, or even a tart lemon curd. The rich, creamy texture of clotted cream also pairs beautifully with the crumbly scones.
For beverages, a traditional English tea is an ideal match. Earl Grey, Darjeeling, or a robust breakfast tea complement the scones perfectly. For a modern twist, consider pairing with a sparkling lemonade or a fruity iced tea.
Cream Preparation
To prepare the cream, combine whipping cream with white sugar and, if desired, a hint of vanilla extract. Beat the mixture until soft peaks form, creating a light and airy texture that is perfect for spreading on scones. This whipped cream can be made in advance and stored in the refrigerator until ready to use.
For variations, you can infuse the cream with different flavors. A touch of lemon zest or a dash of almond extract can add a delightful twist to the traditional whipped cream.
Storage and Reheating
To keep your scones fresh, store them in an airtight container at room temperature for up to two days. If you need to keep them longer, they can be frozen. Simply place the cooled scones in a freezer-safe bag and store for up to three months. When ready to enjoy, reheat the scones in a preheated oven at 150°C/300°F for about 10 minutes.
By following these tips and instructions, you’ll be able to bake delicious, tender scones every time. Enjoy them fresh from the oven with your favorite toppings and a warm cup of tea.
Ingredients
- Extra flour, for dusting
- Extra milk, for brushing
- 80g / 3 oz cold salted butter, cubed (Note 2)
- 3 cups / 450g self-raising flour (Note 1)
- 1 cup / 250 ml cold milk (Note 2)
Serving:
- Strawberry jam (or another preferred variety)
- 1 cup / 250 ml whipping cream
- 1 tbsp white sugar
- 1/2 tsp vanilla extract (optional)
Instructions
Preheat your oven to 200°C/390°F (standard) or 180°C/350°F (fan/convection).
Place the flour in a food processor and add the butter cubes. Pulse on high for about 8 seconds until the mixture looks like breadcrumbs.
Pour the milk evenly over the flour mixture (avoid pouring it all in one spot). Blitz on high for 6 to 8 seconds until the crumbs form into dough balls.
Transfer the dough onto a clean work surface, making sure to scrape out any remaining bits from the food processor.
Gently knead the dough no more than 10 times, just until it comes together into a smooth ball. Pat the dough into a disc about 2 cm / 4/5″ thick. If needed, dust lightly with extra flour.
For a smoother top, you may gently roll a rolling pin over the dough.
Dip a 5 cm / 2″ round cutter into extra flour. Press the cutter straight down into the dough and lift it out without twisting. Continue cutting out scones from the dough.
Carefully transfer the cut scones to a baking tray, avoiding any smearing or pressing on the sides (Note 4).
Gather the remaining dough scraps and repeat the cutting process. You should get about 10 scones in total.
Optionally, brush the tops of the scones lightly with milk.
Bake the scones for 10 to 12 minutes until the tops are golden and they sound hollow when tapped.
Remove from the oven and transfer the scones onto a dish towel, wrapping them loosely to keep the tops soft.
Once cooled to a warm temperature (about 10 – 15 minutes), they are ready to serve. Traditionally, scones are split open by hand, then spread with jam and topped with a dollop of cream.
Cream:
Whip the cream with the sugar and vanilla until soft peaks form. This will yield about 2 cups of whipped cream.
Scones Recipe
Ingredients
- Extra flour for dusting
- Extra milk for brushing
- 80 g / 3 oz cold salted butter cubed (Note 2)
- 3 cups / 450g self-raising flour Note 1
- 1 cup / 250 ml cold milk Note 2
Serving:
- Strawberry jam or another preferred variety
- 1 cup / 250 ml whipping cream
- 1 tbsp white sugar
- 1/2 tsp vanilla extract optional
Instructions
- Preheat your oven to 200°C/390°F (standard) or 180°C/350°F (fan/convection).
- Place the flour in a food processor and add the butter cubes. Pulse on high for about 8 seconds until the mixture looks like breadcrumbs.
- Pour the milk evenly over the flour mixture (avoid pouring it all in one spot). Blitz on high for 6 to 8 seconds until the crumbs form into dough balls.
- Transfer the dough onto a clean work surface, making sure to scrape out any remaining bits from the food processor.
- Gently knead the dough no more than 10 times, just until it comes together into a smooth ball. Pat the dough into a disc about 2 cm / 4/5″ thick. If needed, dust lightly with extra flour.
- For a smoother top, you may gently roll a rolling pin over the dough.
- Dip a 5 cm / 2″ round cutter into extra flour. Press the cutter straight down into the dough and lift it out without twisting. Continue cutting out scones from the dough.
- Carefully transfer the cut scones to a baking tray, avoiding any smearing or pressing on the sides (Note 4).
- Gather the remaining dough scraps and repeat the cutting process. You should get about 10 scones in total.
- Optionally, brush the tops of the scones lightly with milk.
- Bake the scones for 10 to 12 minutes until the tops are golden and they sound hollow when tapped.
- Remove from the oven and transfer the scones onto a dish towel, wrapping them loosely to keep the tops soft.
- Once cooled to a warm temperature (about 10 – 15 minutes), they are ready to serve. Traditionally, scones are split open by hand, then spread with jam and topped with a dollop of cream.
Cream:
- Whip the cream with the sugar and vanilla until soft peaks form. This will yield about 2 cups of whipped cream.
Notes
- Self-raising flour is essentially plain or all-purpose flour with baking powder already mixed in. To make your own, measure out 3 cups of plain flour, then remove 6 teaspoons of the flour and replace it with 6 teaspoons of baking powder.
- Alternatively, you can use unsalted butter and add 1/4 teaspoon of salt.
- Full-fat milk is preferred for the best results, though low-fat milk is acceptable. Avoid using 0% fat milk.
- Ensuring maximum rise and straight scones: this technique helps them rise properly. Have you ever had lopsided scones?
- Knife Cutting: You can also shape the dough into a square or rectangle and cut it with a sharp knife instead of using a round cutter.
- No Food Processor: You can make this recipe the traditional way by rubbing the butter into the flour with your fingertips or a pastry cutter until the mixture resembles breadcrumbs. Then, stir in the milk using a butter knife. You may need an extra 2 tablespoons of milk to prevent the dough from being too dry.
- Scones are best served warm. To reheat, microwave for 10 seconds for one scone or about 20 seconds for all of them. Alternatively, you can reheat them in the oven by wrapping them in foil and baking at 160°C/320°F for 5 minutes.