
Homemade Bread Recipe
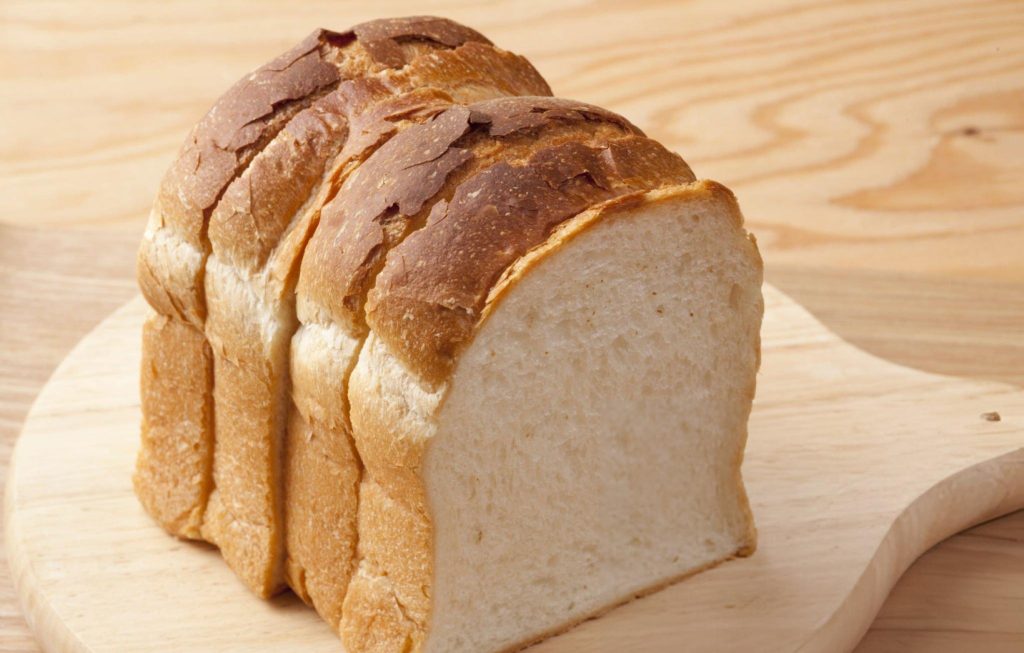
Nothing compares to the aroma of freshly baked bread wafting through your kitchen. With its soft texture and golden crust, homemade bread is the epitome of comfort food. Whether you’re an experienced baker or trying bread-making for the first time, this recipe promises a rewarding experience from start to finish. Simple ingredients, a few careful steps, and you’ll have a perfectly baked loaf to share with family or enjoy on your own.

Ingredients Overview
At the heart of this bread recipe is a set of basic yet essential ingredients that come together to create magic. The flour forms the structure, with the choice between all-purpose and bread flour, each offering a slightly different texture. Warm water helps to activate the yeast, ensuring your dough rises beautifully. Yeast, of course, is the star of the show—it’s responsible for the bread’s airy, light texture. A touch of honey or sugar not only feeds the yeast but adds a subtle sweetness. Salt balances the flavors, while a bit of oil keeps the bread moist and tender. Each ingredient plays a vital role in creating the perfect loaf.
You can also customize the recipe slightly by choosing honey for a more natural sweetener or sugar for a more straightforward flavor profile. The type of oil is flexible too—canola oil imparts a neutral taste, while vegetable oil offers a bit more richness.
Step-by-Step Instructions for Perfect Homemade Bread
Starting with the yeast, it’s crucial to create an ideal environment to activate this key ingredient. Warm water between 105-115°F ensures the yeast wakes up and does its job of making the dough rise. If the water is too hot or cold, the yeast won’t activate properly. Once you’ve combined the yeast with a pinch of sugar or honey, letting it sit until it becomes bubbly and frothy is a reassuring sign that your bread is off to a good start.
Next, you blend the rest of the ingredients, starting with the remaining sugar or honey, salt, oil, and three cups of flour. Mixing them until smooth, you’ll gradually incorporate more flour until the dough becomes elastic. This process is key—too little flour results in a sticky dough, while too much can make it dense. Achieving that perfect consistency takes patience, but it’s the difference between good bread and great bread.
Once you’ve mixed and kneaded the dough for the recommended 4-5 minutes in a mixer or 5-8 minutes by hand, the dough should be smooth and elastic. You can test this by poking it lightly; it should bounce back slightly, indicating it’s ready for the next step.
For the first rise, place the dough in a greased bowl and cover it. This rise allows the dough to double in size, making it light and airy. Ensuring the dough is well-covered and placed in a warm spot will help this process along. In about 1 ½ hours, you’ll see the dough has expanded beautifully.
After the first rise, punching down the dough releases the trapped air bubbles and prepares it for shaping. Dividing the dough into two portions, you can now shape it into long logs, ready for the loaf pans. Let the dough rise once more in the pans, and after 45 minutes to an hour, the tops should rise about an inch above the rim, ensuring a lofty, well-shaped loaf.
Baking the Bread
Baking at 350°F for 30-33 minutes ensures the bread develops a golden, crunchy crust while staying soft inside. You can tell the bread is done by giving the top a gentle tap—it should sound hollow. This is a good sign that the interior is fully baked, without being dense. Once out of the oven, inverting the loaves onto a cooling rack prevents sogginess from condensation.
Brushing the still-warm bread with melted butter adds a luxurious touch, softening the crust slightly and adding flavor. Allowing the bread to cool for at least 10 minutes ensures easier slicing and better texture.
Recipe Tips & Frequently Asked Questions
Why didn’t my dough rise?
Yeast might not be fresh, or the water could have been too hot or too cold. Double-check these elements before starting again.
Can I use instant yeast instead of active dry yeast?
Yes, you can, but remember to reduce the rising time slightly, as instant yeast works faster.
How do I know if I’ve kneaded the dough enough?
The dough should be smooth, elastic, and bounce back slightly when poked. It shouldn’t feel sticky.
Can I freeze the dough or baked bread for later?
Absolutely. You can freeze the dough after the first rise or freeze the baked loaves. Just thaw and bake or reheat as needed.
How to store homemade bread for maximum freshness?
Store it in an airtight container or plastic bag at room temperature for 2-3 days. For longer storage, refrigerate it for up to 5 days.
How to troubleshoot yeast activation and dough consistency?
If the yeast doesn’t bubble, it’s likely expired. For dough consistency, add flour gradually to avoid dryness or stickiness.
How to customize bread with additional ingredients like seeds or herbs?
You can incorporate seeds like sesame or flax, or herbs like rosemary, into the dough during mixing or as a topping.
What to Serve With This Recipe
Homemade bread is incredibly versatile and pairs beautifully with a wide variety of dishes. Serve it warm with a simple spread of butter, or elevate it with a drizzle of olive oil and a sprinkle of sea salt. It’s the perfect accompaniment to hearty soups like tomato or lentil, balancing out the richness with its soft texture.
For a more substantial meal, consider making sandwiches with this bread—its soft crumb and golden crust make it an excellent choice for anything from classic grilled cheese to deli sandwiches piled high with meat and veggies. It also works wonderfully as a side dish to any stew or roast, allowing you to soak up every last drop of sauce or gravy.
Storage and Reheating Tips
To keep your bread as fresh as possible, store it in an airtight bag or container once it’s cooled completely. At room temperature, it will stay soft and fresh for about 2-3 days. If you plan to store it longer, refrigerate it for up to 5 days. To enjoy that just-baked taste again, lightly toast the slices, or pop the loaf in the oven at 350°F for a few minutes.
If you’ve made extra loaves or want to prepare ahead, homemade bread freezes exceptionally well. Wrap it tightly in plastic wrap, then place it in a freezer-safe bag. To reheat, let it thaw at room temperature and then warm it in the oven to bring back its soft texture.
The satisfaction of making homemade bread lies not only in the delicious result but also in the simple joy of the process. Whether you’re kneading by hand or watching the dough rise, each step is a rewarding experience. With this easy recipe, you’ll always have a fresh, warm loaf of bread to complement your meals or enjoy on its own. Versatile, comforting, and undeniably delicious, homemade bread is a staple that never disappoints.
Ingredients
4 – 5 1/2 cups all-purpose or bread flour
2 cups warm water (105-115 degrees)
2 Tablespoons oil (canola or vegetable)
1 Tablespoon active dry yeast
1/4 cup honey or sugar
2 teaspoons salt
Instructions
Begin by preparing the dough: In a large mixing bowl or the bowl of a stand mixer, combine the warm water, yeast, and a small pinch of the honey or sugar. Allow it to sit for 5-10 minutes, until the mixture becomes foamy and bubbly. This process ensures your yeast is active—if no bubbles form, it’s time to start again with fresh yeast.
Next, stir in the remaining honey or sugar, salt, oil, and 3 cups of flour. Blend the ingredients together until fully incorporated. Gradually add another cup of flour, and continue mixing. While the mixer is running, continue adding flour ½ cup at a time. Keep mixing until the dough begins to pull away cleanly from the sides of the bowl. You’re looking for a smooth, elastic texture that slightly sticks to your finger, without being overly sticky. If needed, add a bit more flour to achieve the right consistency.
Now, knead the dough: Let the mixer run on medium speed for 4-5 minutes, or knead by hand on a lightly floured surface for 5-8 minutes, until the dough becomes smooth and elastic.
For the first rise, grease a large bowl with oil or spray it with cooking spray. Place the dough inside, ensuring it is evenly coated with oil. Cover the bowl with plastic wrap or a dish towel and leave it in a warm spot to rise. The dough should double in size after about 1 ½ hours.
Once the dough has risen, generously spray two 9×5-inch loaf pans with cooking spray. For extra insurance, you can line the bottom of each pan with a piece of parchment paper, though this is optional.
Punch the dough down to release any air pockets. Divide the dough into two equal portions, shaping each into a long log. Place the shaped dough into the prepared loaf pans.
For the second rise, cover the loaf pans with a dry dish towel, or use plastic wrap sprayed with cooking spray to prevent sticking. Let the dough rise for 45 minutes to an hour, or until the tops have risen about 1 inch above the rim of the pans. Carefully remove the covering.
Bake the bread: Preheat your oven to 350°F. Bake the loaves for 30-33 minutes, until the tops are a rich golden brown. When you tap the top of the loaf, it should sound hollow.
Carefully remove the loaves from the pans and place them on a wire rack to cool. While they are still warm, brush the tops with melted butter. Let them cool for at least 10 minutes before slicing.
Store the cooled bread in an airtight container or bag for up to 2-3 days at room temperature, or refrigerate for up to 5 days.
Homemade Bread Recipe
Ingredients
- 4 – 5 1/2 cups all-purpose or bread flour
- 2 cups warm water 105-115 degrees
- 2 Tablespoons oil canola or vegetable
- 1 Tablespoon active dry yeast
- 1/4 cup honey or sugar
- 2 teaspoons salt
Instructions
- Begin by preparing the dough: In a large mixing bowl or the bowl of a stand mixer, combine the warm water, yeast, and a small pinch of the honey or sugar. Allow it to sit for 5-10 minutes, until the mixture becomes foamy and bubbly. This process ensures your yeast is active—if no bubbles form, it’s time to start again with fresh yeast.
- Next, stir in the remaining honey or sugar, salt, oil, and 3 cups of flour. Blend the ingredients together until fully incorporated. Gradually add another cup of flour, and continue mixing. While the mixer is running, continue adding flour ½ cup at a time. Keep mixing until the dough begins to pull away cleanly from the sides of the bowl. You’re looking for a smooth, elastic texture that slightly sticks to your finger, without being overly sticky. If needed, add a bit more flour to achieve the right consistency.
- Now, knead the dough: Let the mixer run on medium speed for 4-5 minutes, or knead by hand on a lightly floured surface for 5-8 minutes, until the dough becomes smooth and elastic.
- For the first rise, grease a large bowl with oil or spray it with cooking spray. Place the dough inside, ensuring it is evenly coated with oil. Cover the bowl with plastic wrap or a dish towel and leave it in a warm spot to rise. The dough should double in size after about 1 ½ hours.
- Once the dough has risen, generously spray two 9×5-inch loaf pans with cooking spray. For extra insurance, you can line the bottom of each pan with a piece of parchment paper, though this is optional.
- Punch the dough down to release any air pockets. Divide the dough into two equal portions, shaping each into a long log. Place the shaped dough into the prepared loaf pans.
- For the second rise, cover the loaf pans with a dry dish towel, or use plastic wrap sprayed with cooking spray to prevent sticking. Let the dough rise for 45 minutes to an hour, or until the tops have risen about 1 inch above the rim of the pans. Carefully remove the covering.
- Bake the bread: Preheat your oven to 350°F. Bake the loaves for 30-33 minutes, until the tops are a rich golden brown. When you tap the top of the loaf, it should sound hollow.
- Carefully remove the loaves from the pans and place them on a wire rack to cool. While they are still warm, brush the tops with melted butter. Let them cool for at least 10 minutes before slicing.
- Store the cooled bread in an airtight container or bag for up to 2-3 days at room temperature, or refrigerate for up to 5 days.
Notes
- Flour: Use bread flour for a chewier loaf or all-purpose flour with no recipe changes. Whole wheat flour isn’t a 1:1 substitute due to lower gluten content.
- Yeast: For instant or rapid-rise yeast, skip proofing, add yeast in step 2, and adjust rise times (they’ll be faster).
- Quick-rise Tip: To speed up the first rise, grease dough, cover, and place in a preheated (then turned-off) 180°F oven with the door cracked.
- Make-ahead: Refrigerate dough after step 4 (before first rise) for up to one day. Bring to room temperature, punch down, and shape.
- Freezing Dough: Freeze shaped loaves before second rise. Thaw and rise at room temperature (5 hours) before baking.
- Freezing Baked Bread: Cool completely, place in resealable bags, and freeze for up to 3 months. Thaw at room temperature or in the fridge.
- Bread Machine: Halve the recipe for one loaf, depending on machine capacity.