
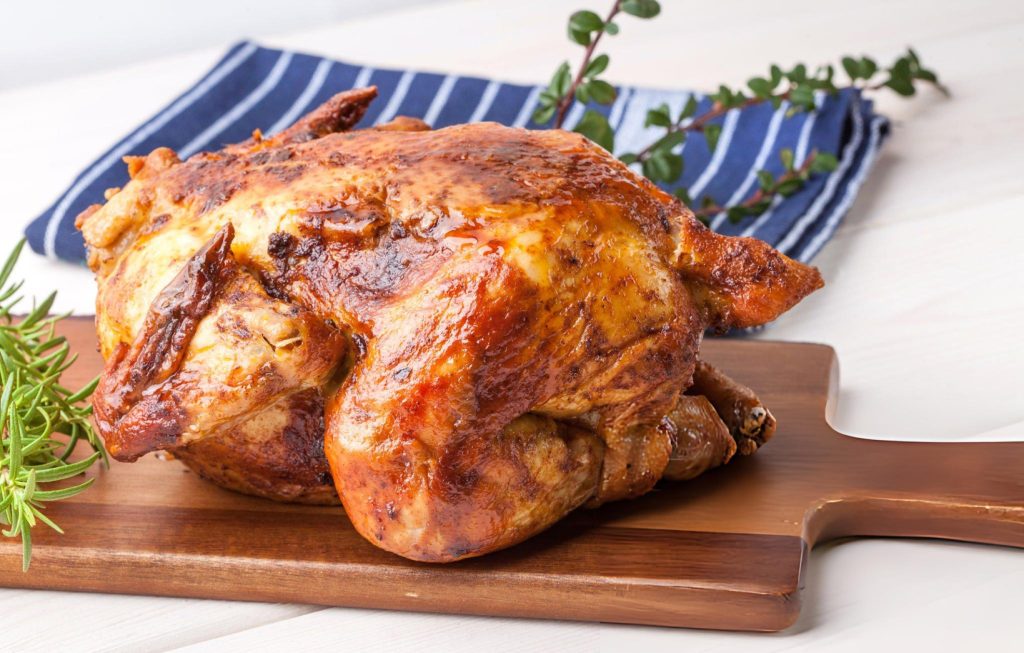
Beer Can Chicken Recipe
Beer can chicken is a grilling favorite, blending smoky, crispy skin with moist and flavorful meat. This cooking method has gained popularity due to its simplicity and the distinctive flavor profile created by the steam from the beer. As the chicken grills, the beer evaporates, infusing the meat with subtle flavors while keeping it juicy on the inside and crisp on the outside. It’s a fantastic way to elevate your grilling game and impress guests with a show-stopping centerpiece at your next barbecue.
Ingredients You’ll Need
To make beer can chicken, you’ll need a few key ingredients that come together to create a delicious dish.
Start with a 4-pound whole chicken. The size of the chicken matters because smaller chickens cook more evenly in this method, and a medium-sized bird allows the beer’s steam to work its magic without overcooking the meat.
Olive oil or any preferred vegetable oil is essential for helping the seasoning stick and to give the skin a nice, crispy finish. Salt and pepper are your base seasonings—sea salt or kosher salt works best to penetrate the skin and season the meat thoroughly. Fresh thyme adds an herbal touch, and if fresh isn’t available, dried thyme can work just as well. The star of the show is a 12-ounce can of beer. It needs to be half-full and at room temperature to ensure the steam circulates properly. If you want more aromatic complexity, you can also throw a sprig of rosemary, sage, or additional thyme into the can.
Step-by-Step Instructions for Perfect Beer Can Chicken
Begin by preparing the grill. If you’re using a charcoal grill, you’ll want to create two cooking zones. Arrange the coals on one side of the grill, leaving the other side free of coals. This indirect heat setup allows the chicken to cook slowly and evenly without being exposed to direct flames. For a gas grill, light only half of the burners and leave the other half off. The indirect heat from this setup ensures the chicken won’t dry out.
Next, season and oil the chicken. After removing any neck pieces or giblets from the cavity, mix together your salt, pepper, and thyme. Generously rub this seasoning blend all over the chicken, paying special attention to the inside cavity for maximum flavor. Massage the olive oil into the chicken’s skin to help it crisp up during cooking.
Once seasoned, it’s time to position the chicken on the beer can. Ensure that the beer can is only half-full and open. This allows the beer to evaporate, steaming the chicken from the inside. Carefully lower the chicken onto the beer can, positioning it so that the can fits snugly into the cavity and the bird stands upright. The legs and the can act as a tripod to keep the chicken stable.
When cooking with indirect heat, place the chicken on the side of the grill without direct heat, using the beer can and legs to keep it upright. Cover the grill and let it cook for an hour without disturbing it. After an hour, check the chicken, and if necessary, refresh the coals. Continue checking every 15 minutes until a meat thermometer inserted into the thickest part of the thigh reads 165°F. This typically takes around 1.5 hours for a 4-pound chicken, but timing will vary based on the heat of the grill and the size of the bird.
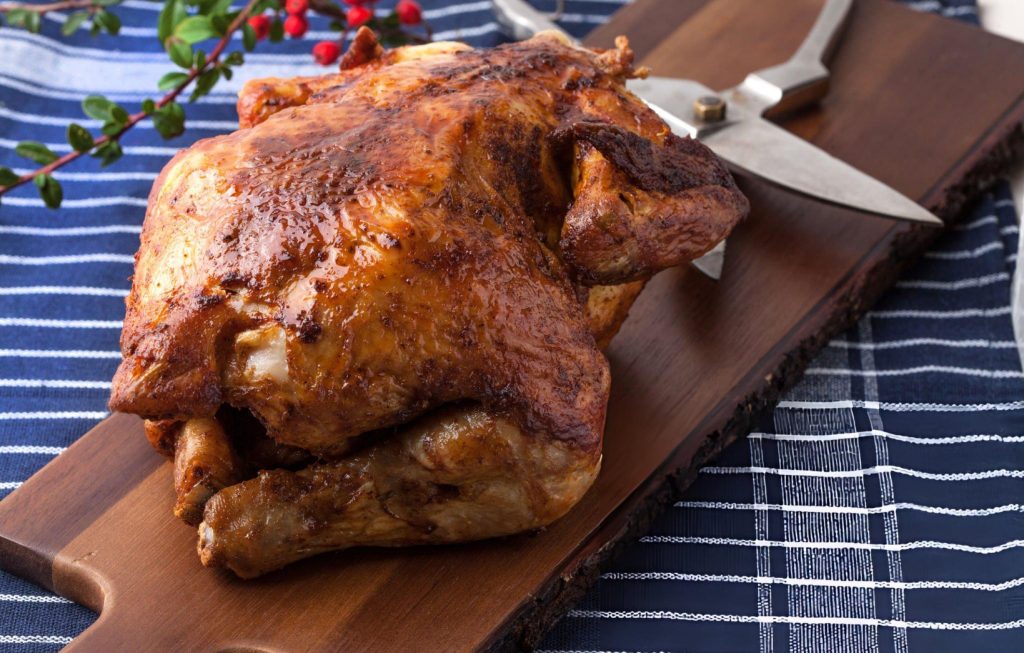
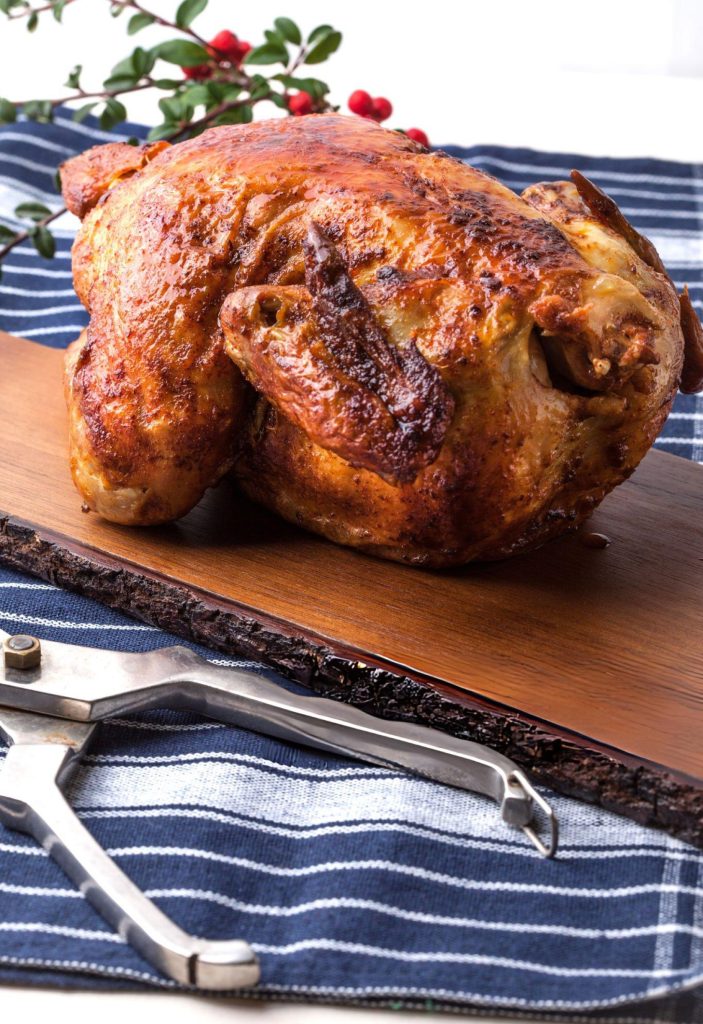
After the chicken is fully cooked, carefully transfer it to a tray. The beer can will be extremely hot, so use tongs and a spatula to avoid burns. Let the chicken rest for about 10 minutes before removing the can.
Recipe Tips & Frequently Asked Questions
Expert advice for crispy skin and tender meat:
Ensure the grill stays at a consistent temperature, ideally around 350°F, to keep the skin crispy and the inside juicy.
Adding extra herbs or spices:
Experiment with different seasoning blends. Adding garlic powder, smoked paprika, or even a dash of cayenne pepper can take the flavor up a notch.
Avoiding common pitfalls like the chicken falling over:
Make sure the beer can is firmly in place and the legs are positioned to balance the chicken. If the bird starts to tip, use a grill-safe chicken holder for extra stability.
Keeping the grill temperature even:
Always use indirect heat, and if the coals are cooling, refresh them periodically to keep the temperature steady.
Can I use a different liquid besides beer?
Yes! You can substitute with soda, apple cider, or even chicken broth for a different flavor profile.
What type of beer works best?
Light beers like lager or pilsner are ideal as they offer a mild flavor that doesn’t overpower the chicken.
How long does it take to cook a smaller or larger chicken?
A smaller chicken (around 3 pounds) will take closer to 1 hour, while larger birds (5 pounds or more) can take up to 2 hours.
Can I bake beer can chicken in the oven?
Absolutely. Follow the same process and bake the chicken at 375°F for 1.5 to 2 hours.
What’s the best way to store leftovers?
Store any leftover chicken in an airtight container in the fridge for up to 3 days. For longer storage, freeze it for up to 3 months.
What to Serve With This Recipe
Beer can chicken pairs wonderfully with a variety of sides, allowing you to tailor the meal to your taste. Grilled vegetables like zucchini, bell peppers, and corn on the cob make excellent accompaniments, as they benefit from the same smoky flavors. Fresh salads, such as a tangy coleslaw or a refreshing cucumber and tomato salad, provide a crisp contrast to the rich flavors of the chicken.
For a heartier meal, consider serving it with buttery mashed potatoes, roasted garlic bread, or a grain dish like wild rice or quinoa. You can also elevate the meal with homemade sauces such as a tangy barbecue sauce, garlic aioli, or a herbaceous chimichurri, adding even more layers of flavor to the chicken.
Grilling and Safety Tips
Handling beer can chicken safely is crucial, especially when transferring the bird after it’s cooked. Always wear grill gloves and use long-handled tools like tongs and a spatula to avoid burns from the hot beer can and chicken.
When grilling, keep the temperature around 350°F to 375°F to prevent flare-ups. If you notice flames, close the grill lid or move the chicken to a cooler part of the grill. Always check the internal temperature of the chicken using a meat thermometer, and aim for a reading of 165°F in the thickest part of the thigh to ensure it’s safe to eat.
Beer can chicken is a flavorful and easy way to impress guests at your next barbecue. The combination of crispy skin and juicy meat, infused with subtle beer flavors, makes it a crowd-pleaser. This method is also highly customizable—feel free to play with different seasonings or even experiment with other liquids in place of beer. With the tips and instructions provided, you’ll be grilling up the perfect beer can chicken in no time.
Ingredients
1 (4-pound) whole chicken
2 tablespoons olive oil (or any preferred vegetable oil)
1 tablespoon kosher or sea salt
1 tablespoon black pepper
2 tablespoons fresh thyme, finely chopped (or 1 tablespoon dried thyme)
1 (12-ounce) can of beer, opened and half-empty, at room temperature
Instructions
Prepare the grill:
If using a charcoal grill, arrange the coals on one side, leaving the other half free. For gas grills, ignite only half of the burners to maintain indirect heat.
Season and oil the chicken:
Remove any neck pieces or giblets from inside the chicken if they are present. In a small bowl, combine the salt, pepper, and thyme. Rub this seasoning mixture all over the chicken, ensuring it is evenly coated. Follow up by massaging the chicken with olive oil to create a nice exterior finish.
Position the chicken on the beer can:
Make sure the beer can is half-full and open. If you like, you can add herbs like rosemary, thyme, or sage into the beer for additional aroma. Carefully lower the chicken onto the beer can, ensuring the can fits into the cavity, so the chicken stands upright.
Cook the chicken using indirect heat:
Place the chicken on the side of the grill where there is no direct heat, using the beer can and the legs as support. Cover the grill and allow the chicken to cook undisturbed for an hour. After this time, check the chicken, and if you’re using a charcoal grill, top up the coals as needed.
Continue checking every 15 minutes until a meat thermometer reads 165°F in the thickest part of the thigh. Depending on the grill temperature and chicken size, cooking should take approximately 1.5 hours for a 4-pound chicken.
Alternatively, you can also check for doneness by slicing into the thigh. If the juices run clear and are not pink, the chicken is ready.
Carefully remove and rest the chicken:
With caution, transfer the chicken and beer can from the grill to a tray. The beer can will be extremely hot, so use a metal spatula to lift the can from below and tongs to steady the top of the chicken. Once transferred, let the chicken rest for about 10 minutes.
Remove the beer can by gently lifting the chicken. If it feels stuck, place the chicken on its side and use tongs to remove the can.

Beer Can Chicken Recipe
Ingredients
- 1 4-pound whole chicken
- 2 tablespoons olive oil or any preferred vegetable oil
- 1 tablespoon kosher or sea salt
- 1 tablespoon black pepper
- 2 tablespoons fresh thyme finely chopped (or 1 tablespoon dried thyme)
- 1 12-ounce can of beer, opened and half-empty, at room temperature
Instructions
Prepare the grill:
- If using a charcoal grill, arrange the coals on one side, leaving the other half free. For gas grills, ignite only half of the burners to maintain indirect heat.
Season and oil the chicken:
- Remove any neck pieces or giblets from inside the chicken if they are present. In a small bowl, combine the salt, pepper, and thyme. Rub this seasoning mixture all over the chicken, ensuring it is evenly coated. Follow up by massaging the chicken with olive oil to create a nice exterior finish.
Position the chicken on the beer can:
- Make sure the beer can is half-full and open. If you like, you can add herbs like rosemary, thyme, or sage into the beer for additional aroma. Carefully lower the chicken onto the beer can, ensuring the can fits into the cavity, so the chicken stands upright.
Cook the chicken using indirect heat:
- Place the chicken on the side of the grill where there is no direct heat, using the beer can and the legs as support. Cover the grill and allow the chicken to cook undisturbed for an hour. After this time, check the chicken, and if you’re using a charcoal grill, top up the coals as needed.
- Continue checking every 15 minutes until a meat thermometer reads 165°F in the thickest part of the thigh. Depending on the grill temperature and chicken size, cooking should take approximately 1.5 hours for a 4-pound chicken.
- Alternatively, you can also check for doneness by slicing into the thigh. If the juices run clear and are not pink, the chicken is ready.
Carefully remove and rest the chicken:
- With caution, transfer the chicken and beer can from the grill to a tray. The beer can will be extremely hot, so use a metal spatula to lift the can from below and tongs to steady the top of the chicken. Once transferred, let the chicken rest for about 10 minutes.
- Remove the beer can by gently lifting the chicken. If it feels stuck, place the chicken on its side and use tongs to remove the can.